Showing posts with label brown. Show all posts

Sunday, August 20, 2017

Beer Card

Hey everyone,

My dad's birthday is on Tuesday. He is usually a hard person for me to find card ideas for. I saw this beer mug card idea on Pinterest and thought he might like it.

Here's the card:


I started by embossing the brown paper with a stripe embossing folder. I cut all the mug and beer pieces with my Silhouette. The happy birthday is written with Silhouette Sketch Pens. I distressed the bubbles and the "beer" pieces with tea dye distress ink. I then attached all the pieces to the card.

The inside:
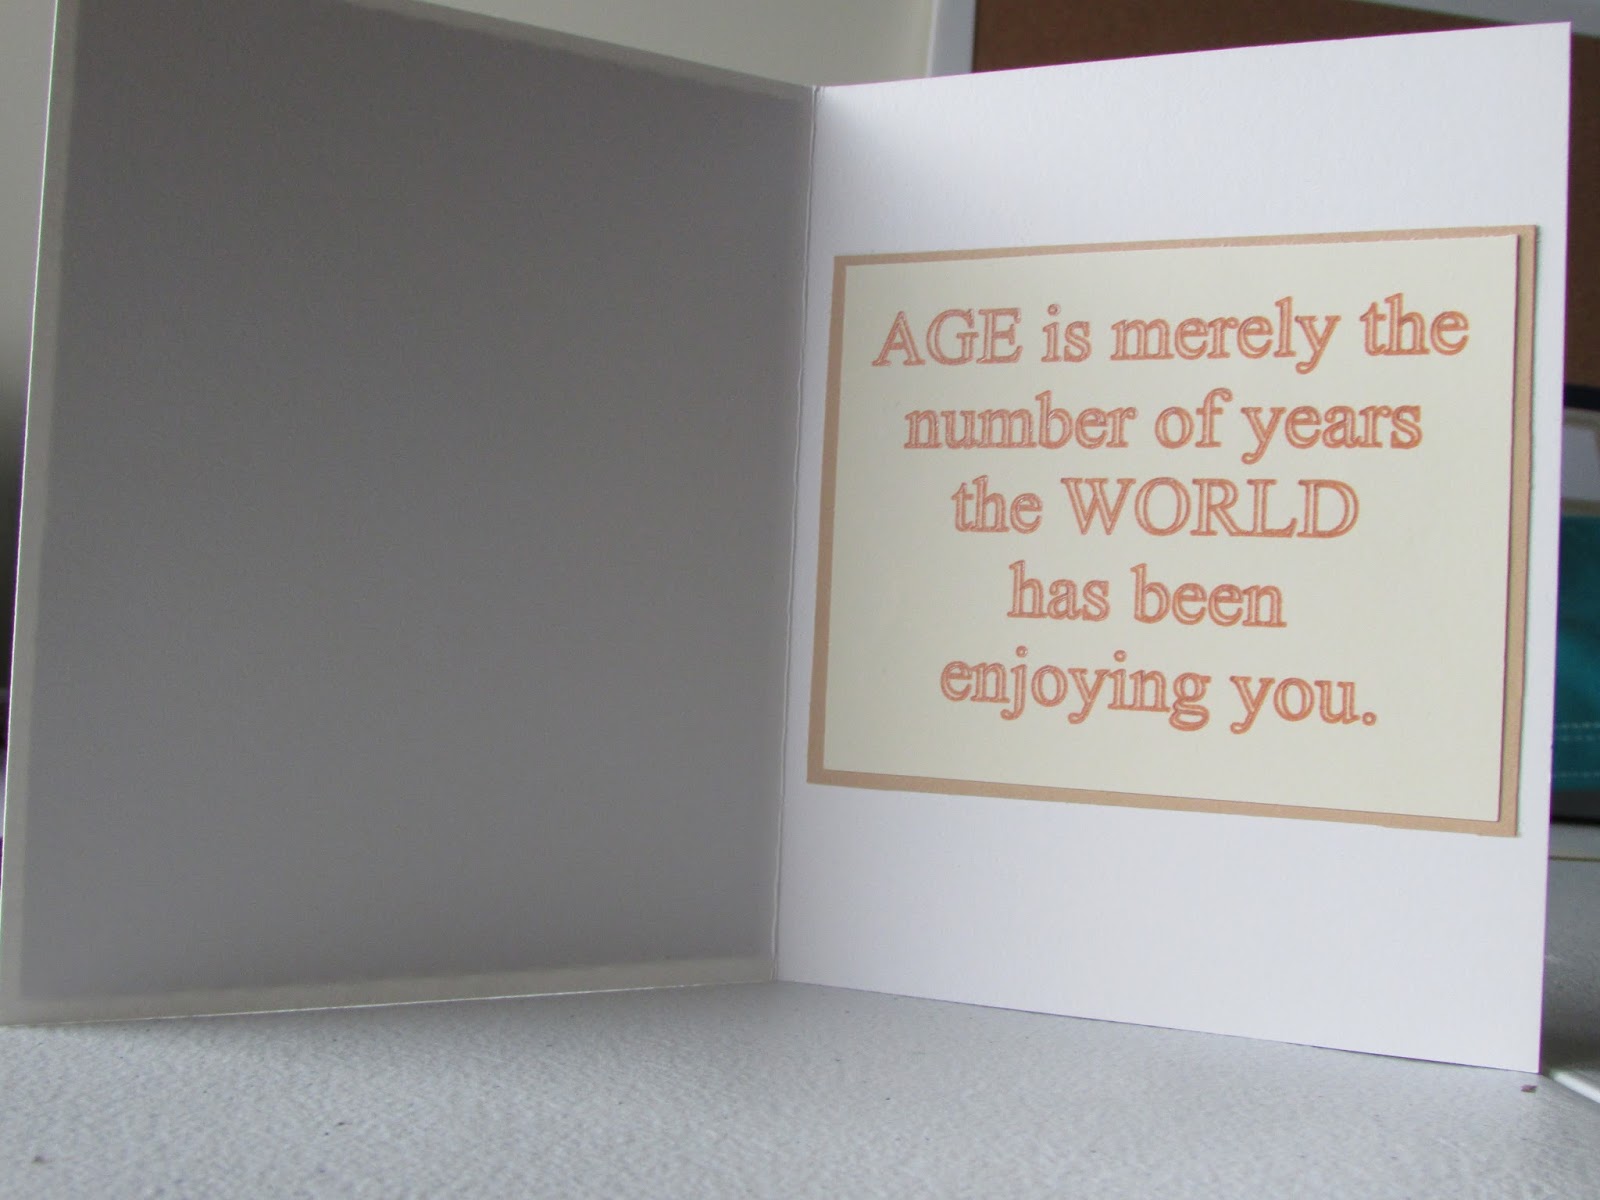

I found this saying in google images when looking for a quote for the inside of the card. My dad is turning 71 so I thought it was a great saying!!!

I am entering these challenges with this card:
Moving Along with the Times - Starts with "B"
Do-Al(1) Kreatives - For the Birthday
Sparkles Monthly - Birthday
DL. ART - Circles & Stripes
That's Crafty! Challenge - Only Cards
Lil Patch of Crafty Friends Challenge - Anything Goes
The Corrosive Challenge - Anything Goes
Crafty Friends - Anything Goes
Scrapper's Delight - Anything Goes
Polkadoodles - Anything Goes
Emerald City Crafts - Anything Goes
Simply Papercrafts - Anything Goes
Colour Crazy Challenge - Anything Goes
Little Miss Muffet Challenge - Anything Goes
Lemon Short Bread Challenge - Anything Goes

That's all! Thanks for looking!!!

~Hazel

Tuesday, August 8, 2017

Poop Emoji Card

Hey Hey,

My boyfriend's niece has a birthday today. She loves emoji's and her favorite is the poop emoji (she is turning 10). As I was searching Pinterest, I found emoji card ideas for how to make the different faces but not one for a shaped poop emoji card, so I made my own.

Here's the poop:


I found a good poop emoji image in google images and put it into my Silhouette program. I made it into a card. I used a dark brown distress ink around the edge of the card. I hand embossed the lines to make the "swirls" of the poop. I added the eyes and the mouth.

Inside:


I stamped "Happy Birthday" on a white square and attached it to the inside of the card.

Here is a whole view of the inside of the card:


I am entering these challenges:
A Gem of A Challenge - Birthday Wishes
Crafty Calendar Challenge - Shaped Cards
Incy Wincy Designs - No Words

Happy Day!!!

~Hazel

Sunday, June 18, 2017

Tool Box Card

Hey,

This has been a busy card making month for me. Each year I make two father's day cards. One for my dad and the other for my boyfriends dad. This year they are the same.

I have made multiple box cards and I really enjoy them as do those that I give them to. For this box card I made tool boxes.

Here it is:


I made the box using the instructions from here. I then cut off the front flap and cut the side flaps in half. I used the cut off flaps to make the drawers on the tool box and hand cut strips of yellow for the drawer handles. All of the tools and the brown background were cut using my Silhouette Cameo. I used my sketch pens to write "Happy Father's Day!" and cut out the circle. I attached the screwdriver and the circle with foam on the back to make them pop-up. I glued the saw, level, and hammer to the inside tabs and attached the wrench to a piece of acetate so it's hanging up out of the tool box.

Here is a top view of the tool box:


 This is the box when it is folded to go inside the envelope:


I would like to enter these challenges:
Fabrika Fantasy - Men/Boys
Crafty Girlz - Anything Goes/Masculine
kreativeinkauf - Special Shaped Card
Whimsie Doodles - Anything Goes/Masculine
Crafty Purple Frog - Make It Manly

Thanks and enjoy your day!

~Hazel

Saturday, June 17, 2017

Yellow Flower Card

Hey all,

My supervisor at work is leaving us to become our curriculum coach. So luckily we'll still see her and she will have more time with her grand daughter and less stress. She loves the color yellow as well as sunflowers.

I made her this thank you card:


I created this card by cutting out the yellow and black scalloped pieces, the "thanks", and the sunflower with my Silhouette Cameo. I cut the red piece to fit a 5X7 card base and rounded the corners. I used an embossing folder to emboss the swirls onto the yellow piece. I used a strip of pink striped decorative tape at the bottom of the embossing and a black and red piece of ribbon in the center on the decorative tape. I distressed the edges of the sunflower with wild honey distress ink, attached that to the ribbon, and added a brown button in the center. I attached all the pieces to the card base and glued the "thanks" above the embossed swirls.

I left the inside blank so my co-workers would have plenty of space to write their thanks and appreciation.

I will be entering these challenges:
Card Mania - Buttons
Creates and Makes - Anything Goes/Use Yellow
Sparkles Monthly - Embossing Wet or Dry (Dry)
Mixed Media Monthly - #34 Buttons


Thank you for looking!

Have a fun day!

~Hazel

Tuesday, June 13, 2017

Iris Folding Car Card

Howdy,

The cook at my work has decided to retire this year. When I asked her what her plans are for retirement, she told me that she plans to do more travelling with her husband, most likely to more casinos. I saw an iris folding car with suitcases on Pinterest and decided that would fit well with a casino as the background.

This is the result:


The card size is 5X7 inches. I cut the car imagine out with my Silhouette Cameo and printed out the iris folding design. I used purple and red paper for the suitcases, black paper for the tires, gray paper that I inked up with distress ink for the bumpers, and blue paper (her favorite color) for the whole of the car. I cut little black strips to go over the suitcases and a black rear windshield. The headlights are cut from red paper. I completed the iris folding by following the pattern on the print out I mentioned earlier. The road and brown sandy areas I cut by hand. I printed out an image that I found on google for the background. I wanted it to look as if the car is driving to Las Vegas. I cut the image to fit around the car and pasted all of the pieces onto the card. I used my Sketch Pens to write the Happy Retirement and my Cameo to cut out the blue oval. I adhered the oval onto a piece of foam to make it pop a little.

On the inside:


Good Luck! Written with my Sketch pens on a white oval and then pasted onto a blue oval.


I am entering these challenges:
Tiddly Inks Challenge - Make It Rectangle
Lemon Shortbread - Anything Goes
Mixed Media Monthly - #27 Travel

Thanks for checking out my card!

Enjoy!

~Hazel

Saturday, June 3, 2017

Motorcycle Card

Hey everyone,

My boyfriend's dad has a birthday today. He likes to drive his Indian motorcycle around this time of year. I finally purchased a motorcycle stamp so I could make him this card:


I cut a brown background and a 2 inch strip from decorative paper. I attached the decorative paper to the left side of the card. I cut the blue and white shapes with my Silhouette Cameo. I stamped the front end of the motorcycle on one white shape, the middle on another, and the back end on the third. I attached each white shape to a blue shape and then layered them on the card.

On the inside:


I stamped "Happy Birthday to You." on the same white shape as the front and layered it on a blue shape. I centered on the inside of the card.

I will be entering these challenges:
Quick Quotes - Masculine
Craft Rocket Challenges - Men/Boys
Fabrika Fantasy - Men/Boys
Mixed Media Monthly - #27 Travel


Have a fantastic day!

~Hazel

Monday, May 29, 2017

Minecraft Gatefold Card

Hey,

My nephew's birthday is coming up and he is a big fan of Minecraft (is there a 12 year-old right now that isn't?). I made him a Minecraft card last year as well so I had to do something different this year.

The card:


I saw this idea on Pinterest (there were various ideas that I looked at). I created a gatefold card with the four different aspects of Minecraft. Each the aspects is 2 inches squared. I scored the 2-inch squares at ¼ inch intervals and the turned the square and did ¼ inch intervals that are perpendicular to the first score lines. I complete the TNT first by cutting a strip of white paper and using a sharpie to write TNT. Next, I completed the pig. The eye squares are cut slightly smaller than the nose squares. Next came the Steve head. The eye squares are the same size as the pigs nose, the hair is about a half inch total, and the mouth is 2 different pieces totaling about ¾ inch. Finally, the creeper. I cut out 5 black squares that were the same size as the pigs nose squares. All of the pieces were attached and then I attached them to the doors of the card.

The inside:


I stamped Happy Birthday on the inside with a new birthday stamp that I purchased from WISH.com.

I plan to enter these challenges:
The Crazy Challenge – Birthday
The Crafter's Cafe - Birthday
Not Just Cards Challenge – One for the Boys
Bastel-Traum – Men or Boys

Have a good night!

~Hazel

Saturday, April 22, 2017

Mountain Bike Card

Hello,

I have a co-worker that asked if I could make a birthday card for her son. Her parents want to get him a mountain bike for his birthday but want him to go pick it out with them so she thought they could give him a card with a mountain bike theme to tell him they are going together to get him a new bike.

Here's the card:


I made the background with distress inks and a sponge. I learned how to make the mountain scene by watching this video: How to Make a Background of Mountains. Pumice stone was used for the mountains and tumbled glass for the sky. I cut out a black frame and the pieces for the bike. I embossed the black bike pieces (except the tire) with a stripe embossing folder. I made the design on the tire with a gold marker. I attached all the bike pieces together, coiled the thin wire around the brads and attached them, and attached the bike to the background.

On the inside, I stamped a simple Happy Birthday.

I am entering these challenges with this card:
Southern Girls - About a Boy (For a boy)
Crafty Sentiments - Men/Boy (For a boy)
Seize the Birthday - Birthday (No Topping)
Cute Card Thursday - Birthdays

Thanks for looking!
~Hazel

Thursday, April 20, 2017

Pug Card

Hey all,

My friend's husband has a birthday coming up so I asked him what his favorite things are. He said dogs and playing with dogs. They just recently got a pug so I thought I'd make him this cute pug card.


Isn't it just adorable? I love how cute it is. I used the print and cut feature on my Silhouette Cameo for the first time ever too! I used that feature for the coloring and cutting out of the pugs. I cut three windows and the triangle border from a beige like paper. There are perforated lines around the edge of the beige paper as well as all the way around the windows. I then stamped a happy birthday in the center below the pugs.


On the inside of the card I used my Silhouette Sketch pens to write the words "Too far for a HUG so I sent you a pug!" Since I wasn't going to see him on his birthday I thought that fit perfectly.

I am entering these challenges:
Crafty Addicts - Anything Goes/Add a Sentiment
Seize the Birthday - Birthday (No topping)
Cute Card Thursday - Birthdays

Thank you for viewing!
~Hazel

Saturday, January 21, 2017

Guitar Card

Hey all,

My boyfriend's birthday is coming up and he is the hardest person for me to do anything for. He likes to play guitar (although he hasn't played recently) so I made him this card:


I cut circles from brown, black, and white cardstock using my circle cutter. I also cut a circle on the front cover of the card base. I used super thin metal wire that I took from ribbon that I bought from Big Al's a few years ago as the strings of the guitar. I used my Silhouette Cameo to cut out the white piece on the bottom and the guitar pick. The words on the pick were written with my Silhouette Sketch Pens.

I stamped Happy Birthday through the hole on the card base so that it is seen on the outside and the inside of the card when opened.

Here is the inside:


I am entering these challenges:
Fabrika Fantasy - Happy Anything
Crafting Musketeers - Party Time
Scribbles Designs - Birthday Bonanza
Oh La La Creations - For a Man or Boy
Dragonfly Journeys - Birthday Bash
A Vintage Journey - Going Round in Circles
Through the Purple Haze - Happy Anything

Have a great day!

~Hazel

Sunday, November 13, 2016

Deer Card

I am super excited about this card. I've been planning it for weeks. I have a friend that I show my cards to and he always asks why he never gets a card so his birthday is coming up and he loves to hunt.

This is the card:


I cut the deer and tag out with my silhouette. The writing on the tag is written with my silhouette sketch pens. I distressed the edges of the tan paper, the tan oval where the deer is, and the tag. I used the Gorgeous Grunge stamp set from Stampin' Up to create the camoflouge background.

I created a camoflouge background on the inside as well. Here is the inside:


I stamped a bold happy birthday on the inside. It stands out pretty well on the camoflouge background.

I will be entering these challenges:
Stampin' Royality - Masculine Projects
Creative Knockouts - Outdoor Fun
My Time to Craft! - Distress It
Allsorts Challenge - Feature a Creature
Crafty Creations - Animals

I appreciate you looking. Enjoy your day!

~Hazel